Getting Started with Lovable
This beginner-friendly guide shows how to use Lovable’s AI app builder to turn simple prompts into a functional MVP without getting stuck in technical complexity.
Creating your first application does not need to begin with the complexity of the build out or technology. This guide outlines the steps you will follow to create a workable Minimum Viable Product (MVP) in Lovable.
You are likely starting your journey with an artificial intelligence (AI) application builder and you are not alone – you are also on time. Lovable is a tool which may appear to be "too much" to start with, however, the learning curve is minimal when following this process.
In other words, Lovable is designed to help you develop web applications quickly by taking a set of clearly defined directions and transforming them into both functional User Interface (UI), features, etc., and then allowing you to refine the final product via iterative prompts. The purpose of this article is to provide a guide for beginners, specifically; Non-Technical Founders, Makers, Students, Freelancers, and others wishing to deploy their own small application(s) without being overwhelmed with setup and boiler plate. Rather than focusing on theory, the emphasis here is on practical progress and understanding just enough to make confident decisions along the way.
This will be a step-by-step, practical, and easy-to-follow guide so you can progress from having a blank screen to having a workable first MVP.
What is Lovable?
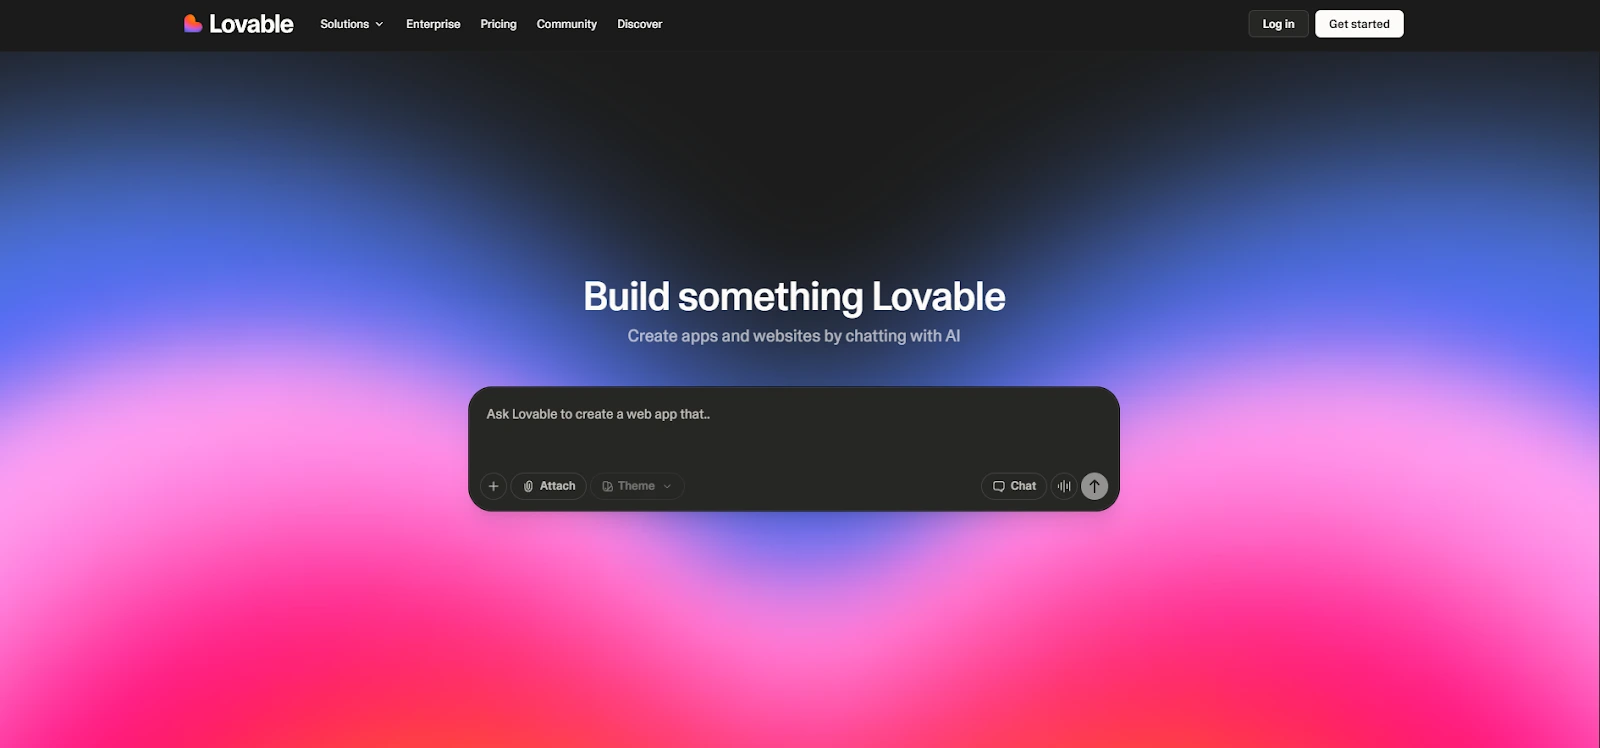
Lovable is a web-based app-building platform that utilizes artificial intelligence to aid you in creating and developing your own custom web application(s) using natural language prompts ("instructions"). In addition to eliminating the need to use a pre-established web development framework, routing, styling, and configuration for the foundation of your new web application, you can simply tell Lovable what you would like to have in your application (i.e. pages, elements, fields, etc.) and Lovable will create a "base" version that you can then continue to develop and modify to suit your needs.
The primary advantages of Lovable are its speed, along with the structure it provides, as you can quickly produce prototypes or Minimum Viable Products (MVPs) in just a few hours instead of days or weeks , especially when producing common application formats, such as landing pages, dashboards, CRUD flows, and basic portals.
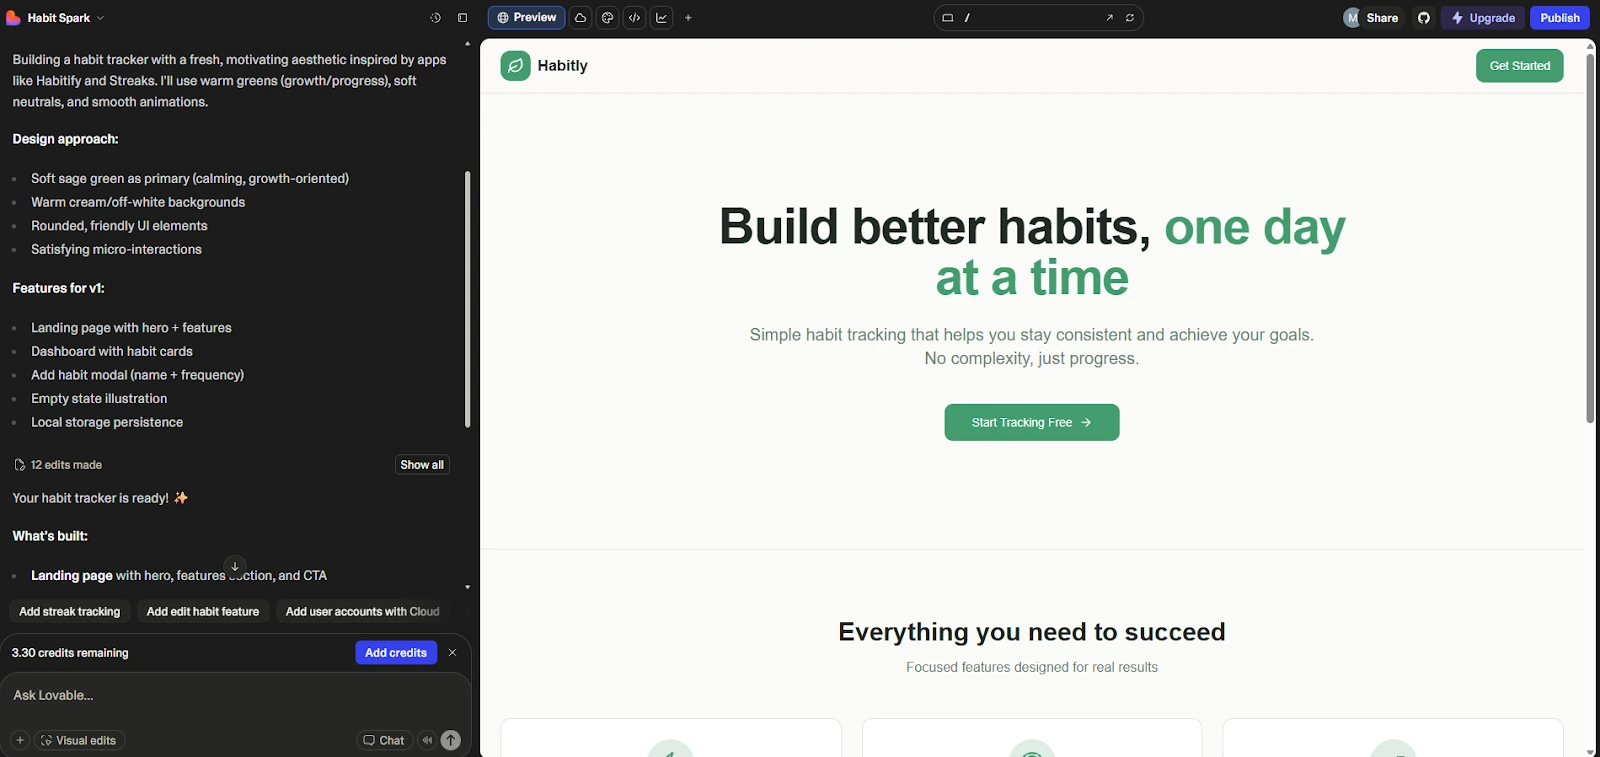
For example, you can ask Lovable to “build a habit tracker with a dashboard, a form to add habits, and a weekly completion view,” then iterate: change layout, add validation, improve empty states, or polish copy.
For official onboarding references, you can also check Lovable’s documentation and guides: Lovable docs – Getting started and Lovable guides.
Why Should Beginners Use Lovable for building an MVP (without coding from scratch)?
- It kills the “blank page problem”. Newcomers to projects often stop when they set up their project, and instead of being able to start shaping a baseline that works, are faced with creating something entirely from scratch.
- Beginners can learn by iterative development. this way, as they develop something real, they will develop patterns for product development (e.g., forms, lists,flows).
- Lovable provides an ideal early- stage validation solution. You can ship a rough-but-working MVP to users. You will get feedback and be able to quickly make those improvements — before investing a lot of time and money in engineering.
- Lovable promotes good product thinking. The moment you enter a question into Lovable, you are required to clearly define your requirements: "what is the user's goal?", "which screens", "what constitutes success?"
- You can still keep your options open. If your project exceeds what can be accomplished using a beginner workflow, you can easily move on to more code-centric tooling (i.e., some makers compare approaches with tools such as Replit, which is sometimes viewed as a more code-first alternative).
Lovable allows beginners to move forward without having to figure out everything at once. As you start with a clear goal, you are able to see something working quickly, and then make incremental improvements to create real understanding of how products are built, while maintaining the option to use more technical tools in the future if the project continues to grow.
If you want a deeper breakdown of strengths, limitations, and real-world pros/cons, read the full review: Lovable review.

Getting Started with Lovable: Step-by-Step Guide
This section is intentionally hands-on. The goal is to get you building fast while keeping your workflow clean, reproducible, and easy to debug later. As you follow along, I strongly recommend adding annotated screenshots (prompt screen, preview, publish/share view) so readers can visually match each step.
Step 1: Create your Lovable account and set up your workspace
Create your account and then spend 60 seconds getting familiarized with the workspace. Many people create their accounts and never look back again until they want to go find some setting, project or share link.
- Sign up for the service and confirm your email address.
- Find your project dashboard (your apps will reside here).
- View basic settings (workspace name, profile, billing etc.) to make sure you're comfortable finding these items.
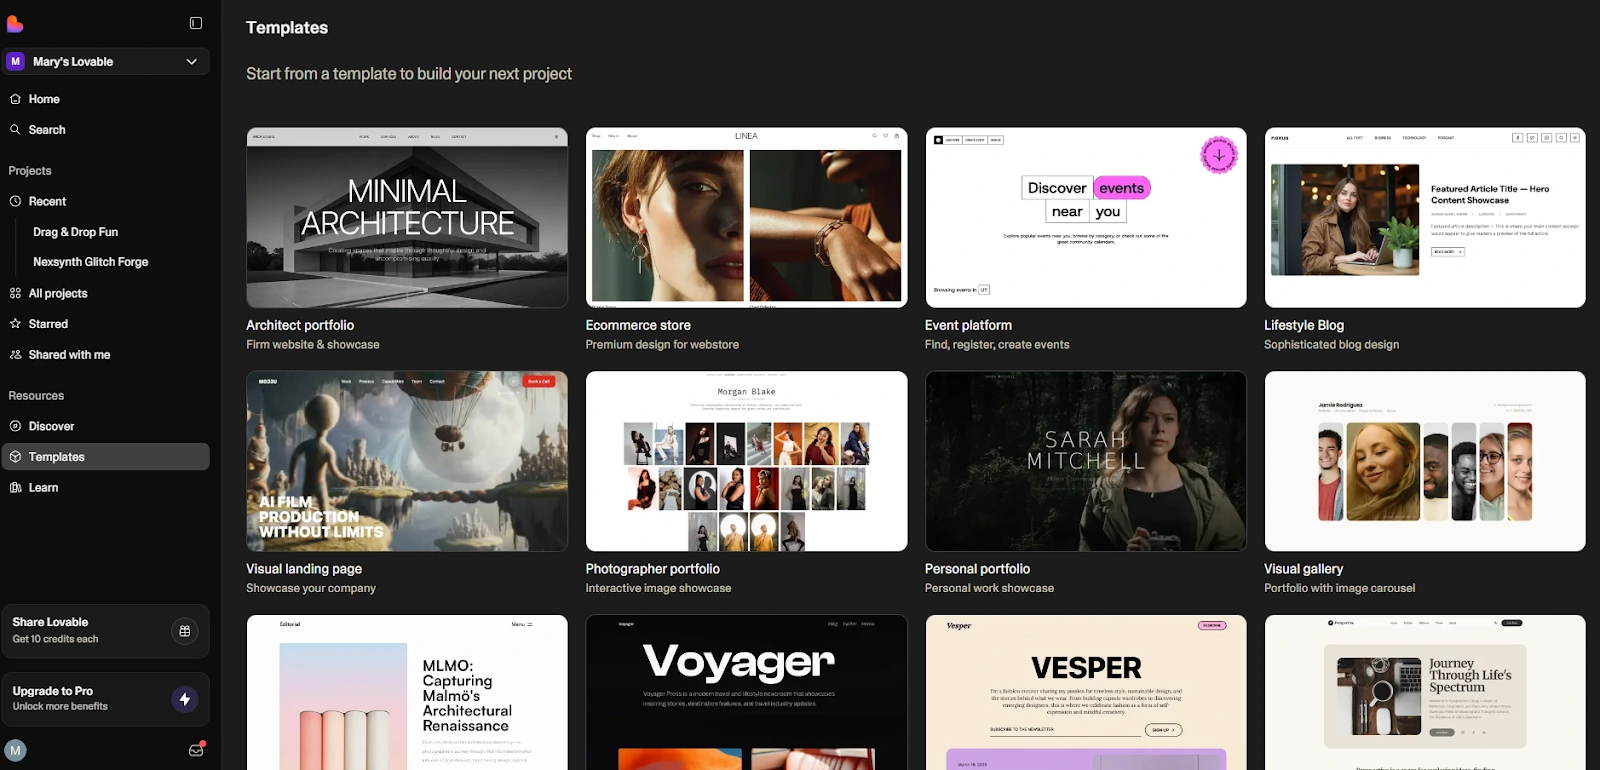
- Lovable offers templates or starter modes, pick the simplest “start from prompt” option for learning.
By the end of this step you should be able to locate how to start a new project, where the preview is located and how to share/publish your application.
Step 2: Build your first project with a “tiny” prompt (the right way)
Your first prompt needs to be very small. The largest mistake beginners make is attempting to build a full SaaS with payments, authentication, admin dashboard, analytics, and referral programs , and being shocked when it becomes difficult to iterate on the entire system.
Use a prompt that includes: user goal, screens, and one “must-have” flow.
Example of beginner-friendly prompt:
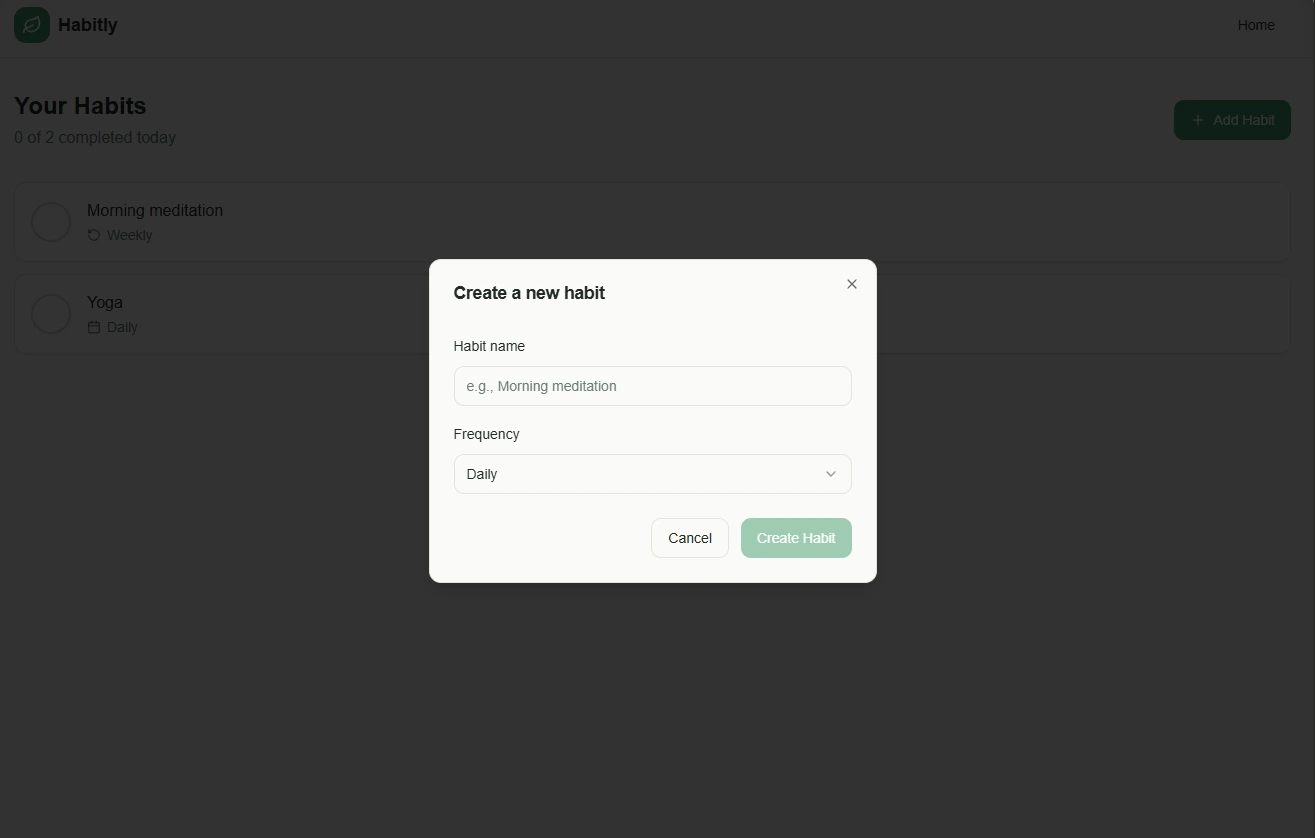
Build a simple habit tracker web app with: a landing page explaining the app, a dashboard page listing habits, and a form to add a habit (name + frequency). Make the UI clean, mobile-friendly, and include empty states.
- User: a person tracking habits daily
- Pages: landing + dashboard
- Data fields: habit name, frequency
- Success: user can add a habit and see it in a list
Once Lovable generates the first version, don’t touch ten things at once. First, verify that the core screens exist and navigation works.
Step 3: Safe Iteration , One Change At A Time
Lovable does best when you use it as a tight feedback loop: Generate, Inspect, Request A Small Change, Verify. When you create a single instruction that has multiple changes in it, it will be hard to determine why one thing happened over another.
- Start with UI-level fixes: spacing, layout, typography, mobile responsiveness.
- Then improve UX: clearer labels, better empty states, more obvious CTAs.
- Finally, Add Behavior: Validation, Confirmation Messages, Basic Logic.
A practical iteration style that works well: "Change X, Leave Everything Else The Same." While it may seem simplistic, it stops accidental feature drift.
By the end of this step, you should have a version of the application that feels cohesive: Readable UI, Consistent Components, and a Stable Core Workflow.
Step 4: Add a real-world feature: forms + data (a beginner CRUD baseline)
In order to move from "Demo" to "Useful," you need to add a small CRUD Workflow: Create and Display Records, With At Least One UX Safeguard.
- Add form validation (required fields, sensible constraints).
- Add a success state (“Habit added”) and an error state (“Please enter a name”).
- Make empty states helpful (“No habits yet, add your first one”).
- Optionally add edit/delete with confirmation to avoid accidents.
Test it like a user would: add three items, refresh, try invalid input, and test on mobile. If something breaks, capture the exact steps before asking Lovable to fix it.
Step 5: Preview, Share, And Publish Your App (First Deployment)
Prior to publishing, do a quick mini-QA pass. There are many who publish too early and lose confidence in their work when a tester finds an edge case in 30 seconds.
- Check navigation across all pages.
- Test the primary action (submit form / create record).
- Verify mobile layout (at least one small-screen check).
- Fix copy that confuses users (“Submit” is weaker than “Add habit”).
Share the preview with 1–3 testers. Ask them to do a single task (example: “Add two habits and mark one as done”) and watch where they hesitate. That hesitation will be your roadmap.

How to use Lovable for prompting an app UI (prompt-to-UI)?
The concept of designing an application user interface has nothing to do with "taste", but rather how well you can define your constraints. In order to achieve a look that is professional in nature, it is necessary that you define the layout, hierarchical relationship between elements, and all possible states of the user interface, not just "vibes".
- Describe the structure: Hero section, benefits grid, testimonials, pricing table, FAQ.
- Specify responsiveness: Mobile-first, stack columns on small screens.
- Ask for UI states: empty, loading, error, success.
- Constrain visual language: minimal SaaS style, high contrast, accessible typography.
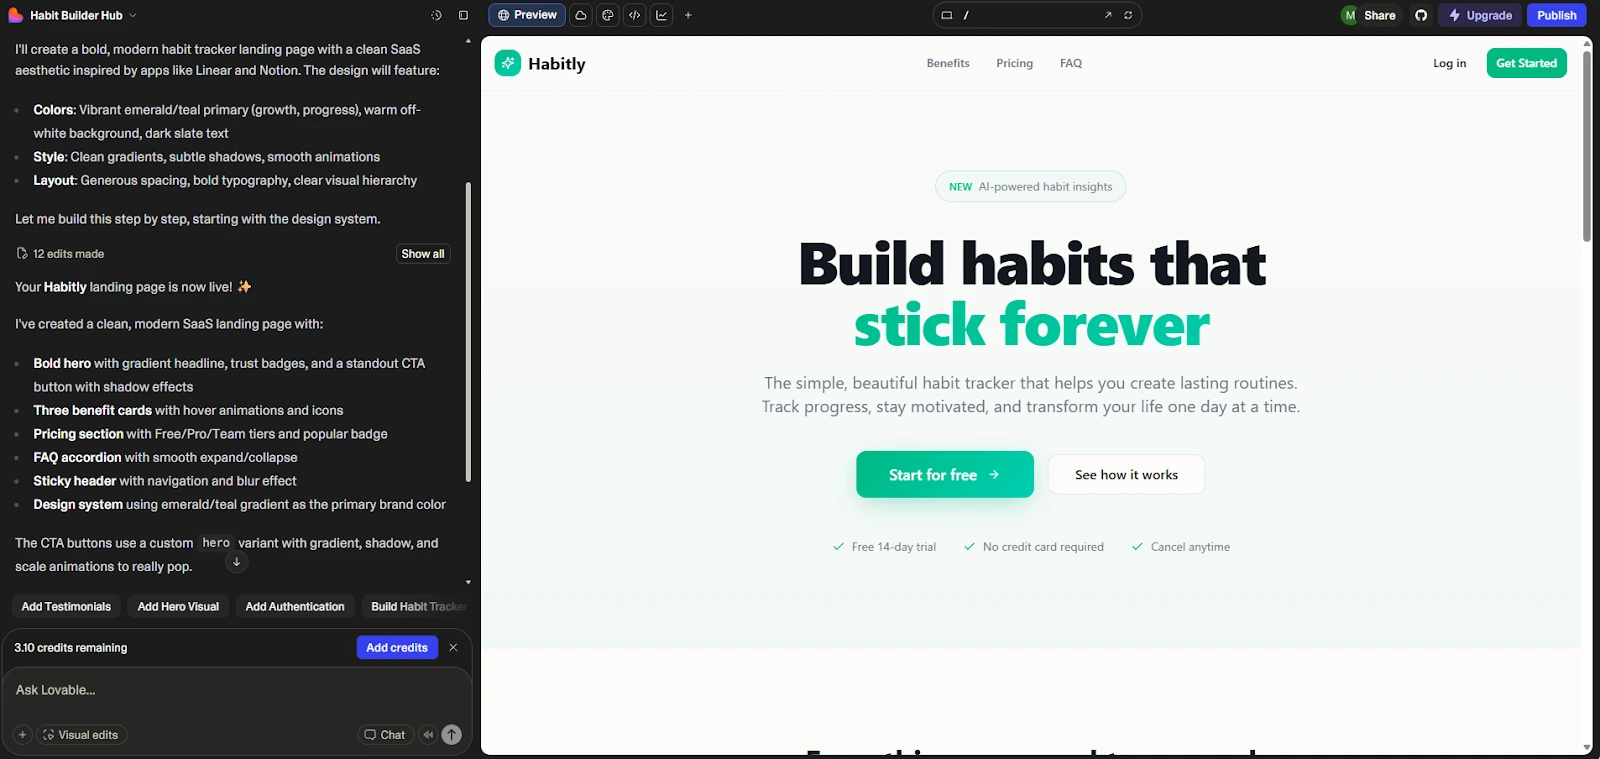
Example UI prompt: "Create a responsive landing page for a habit tracker. The landing page should have a bold hero headline, three benefit cards, a simple pricing section, and an FAQ. The clean SaaS layout should be used throughout the landing page with consistent spacing. A call to action button should stand out from the rest of the content."
Also, if you are interested in exploring other methods to create a user interface for applications, without having to write every single detail yourself, you might also want to compare approaches using a traditional no-code builder such as Bubble : Bubble is often referred to as an alternative to no-code builders.
How to use Lovable for iterating and fixing errors (debugging with AI)?
Using an AI builder for debugging is simple if you can show proof of the issue at hand. If something does not function as intended, instead of stating that "this doesn't work," detail the problem as you would in a well-structured bug report: What was done? What was the desired outcome? What was the actual result? How to replicate the results?
A good way to detail this is: "On page Y, I attempt to accomplish X but receive Z. I expected A. Steps: 1)… 2)… 3)…. Please fix the underlying issue without changing the appearance/UI."
If you have an error message, quote it word-for-word. If you do not have one, provide the shortest possible pathway to reproduce the issue. If the proposed solution from Lovable involves a large-scale re-factoring, simply ask politely to provide the simplest solution first. Small solutions are easier to test/validate, and will be less likely to cause damage to other parts of your application.
How to use Lovable for creating a CRUD app (list, create, edit, delete)?
The CRUD operations are the core of the majority of new MVPs created by beginners: you create records, display them in some way, modify them, remove them and potentially filter/search them. It's all about having a simple data model and clear user interface interactions.
- Pick one entity: “Habit”, “Lead”, “Task”, “Client”, “Invoice draft”.
- Keep fields lean: name + one or two attributes (frequency, status, tag).
- Design the screens: list view → create form → edit view → delete confirm.
- Add guardrails: delete confirmation, inline validation, helpful empty states.
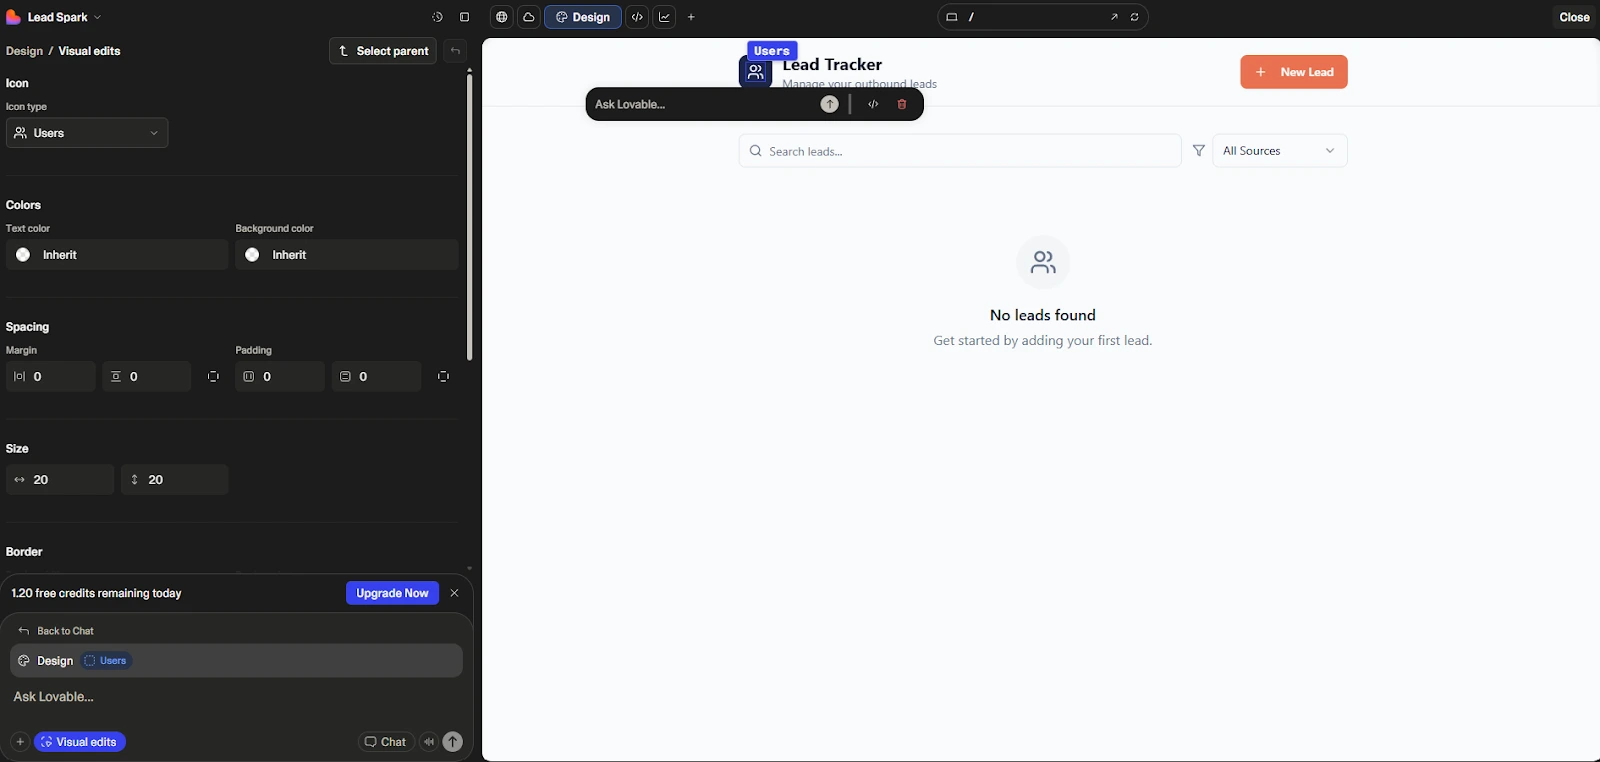
Example (leads mini-CRM): A small lead tracking system may be built from a "New Lead" form (Name, Email, Source), a list view and an "Edit Lead" form. That will likely be sufficient for many early stage outbound workflow processes.
Once you manage one type of record end to end, you have the core building block of most beginner apps. Keeping things simple at this stage makes changes easier and helps you understand how real application flows fit together.
How to use Lovable for publishing and sharing your MVP with users
Publishing is not the finish line, it’s the start of learning. Once you share your MVP, you’re collecting signals: what users try first, what they ignore, what confuses them, what they ask for.
When you share your Lovable project, assign your testers a simple task. Simply asking your users to "explore my product and let me know what you think" results in too much subjective feedback, whereas asking your users to "try to add a habit and then view that habit on the dashboard" will give you concrete areas of friction in your application.
Each time you run a testing session, convert the user's feedback into a clear, concise, actionable request for an iteration of your MVP (i.e. "make the 'add habit' button more visible", "rename 'frequency' to 'how often'", etc.) This is how you can make your MVP more effective and avoid over-bloating your MVP with unnecessary features.
How to use Lovable for connecting external tools (API / integrations)?
Integrations are where beginner projects start to feel “real.” Even one simple connection, like sending form submissions to a spreadsheet or pulling data from an API, can turn a toy app into something genuinely useful.
- Form → external destination: send leads to a database, a CRM, or an email tool.
- Fetch and display data: pull a list of items from an API endpoint and render it in a table or cards.
- Webhooks: trigger an automation when a user submits a form (e.g., notify a Slack channel).
Concrete example: build a “Job Tracker” and connect it to an API that returns a list of jobs (title, company, link). Then add filtering by role type. Start small: one endpoint, one list screen, one filter.
Connecting even a single external service changes how an app is used in practice. By keeping integrations limited and intentional, you can add real usefulness without increasing complexity, while still understanding how data moves in and out of your application.
To learn more: What is an API? or How to Use Webhooks in Lovable
Build a one-page lead capture site with Lovable
The fastest "win" project from this list is the one-page lead capture site because there is a very clear output, which will be a page of value that captures leads. This is the best first win for new users as well, in order to practice prompt discipline and UI iteration.
What to build: a landing page with a hero section, 3 benefits, social proof, and a lead form (name + email).
- Prompt Lovable for the page structure and a clean SaaS layout.
- Ask explicitly for mobile responsiveness and accessibility-friendly contrast.
- Add a form success message and basic validation.
- Test the flow end-to-end: submit, verify success state, check copy clarity.
Screenshot checklist: prompt used, generated page preview, form submission state, mobile view.
A one-page lead capture site keeps the scope narrow while still producing something useful. It gives you a clear outcome, forces you to be precise with prompts, and helps you practice refining layout, copy, and form behavior without getting distracted by extra features.
Build a habit tracker dashboard with Lovable
Habit tracking is a great candidate for a "tiny" "real app": It's well-known; it has a natural CRUD model; and it allows the user to begin testing right away.
Minimum feature set: create habit (name, frequency), list habits, mark as done.
- Add an empty state that nudges action (“Add your first habit”).
- Make “mark as done” a single click with a visual confirmation.
- Include a simple weekly summary (even a count of completions is enough).
Once it works, polish: labels, spacing, and predictable navigation. That’s where beginner apps start to look surprisingly professional.
Build a simple client portal (login + shared resources)
Client portals are often considered an "advanced" concept; however, they can be made beginner-friendly by limiting how much is included; create one Resource Library Page, one Announcements Page, and one Contact Form. If there is authentication in place through Lovable, implement with care; if there isn't, then this will be a safe low risk portal for Non-Sensitive Content.
- Resources: PDFs/links grouped by category (Onboarding, Templates, FAQs).
- Announcements: simple posts list with dates.
- Contact: a form that routes questions to you.
For many freelancers, this is already monetizable as a packaged “client experience” add-on.
Lovable Pricing: the best plan for beginners
The easiest way to evaluate pricing options as a beginner, is to think of how the pricing option can restrict your learning process. Generally speaking, the three things that are usually the biggest concern for a beginner are: How many prototypes can I make? Can I easily share/publish my project? Will the usage restrictions in the pricing option interfere with me trying different approaches?
Most of the time the best approach to start as a beginner is:
Use the free plan to test out the workflow, build one version of your first prototype, and see if you like the iterative process of developing new versions. When you're ready to deliver your prototype to users, upgrade to a paid plan to remove the restrictions and increase your capacity and ability to work collaboratively.
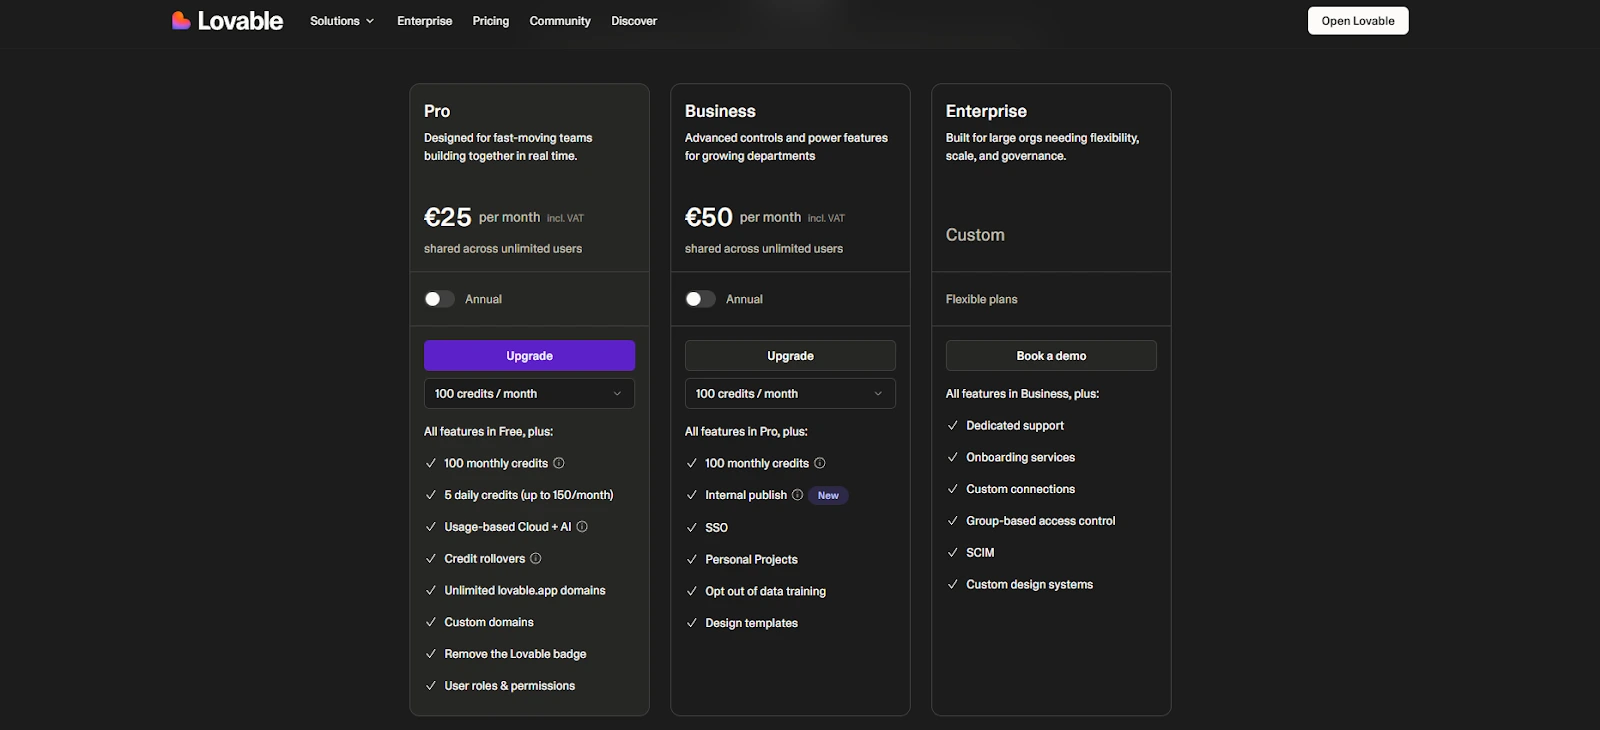
For the exact plan details and current limits, you can check our Lovable pricing plans page or the official pricing page.
If you’re also comparing “builder philosophies,” you can explore alternatives like Bubble (no-code builder) or Replit (more code-first) depending on whether you want visual building or deeper coding control.
Lovable Tutorial: FAQ
How do I start my first project in Lovable if I have zero coding experience?
For someone who has never coded before, your first project should be simple. A landing page (one page) and an active view (for example, a dashboard), are both viable options. Develop a prompt that identifies all of the pages, describes a simple data model, and defines only one Success Criterion ("I am able to enter something into a field, and I will see what I entered"). Generate your initial version of the application and develop it in a piecemeal fashion (i.e., a little at a time). There is no easier way to get started than this.
Is Lovable beginner-friendly compared to other no-code tools?
It certainly can be for beginners, especially since they are able to define their app’s results using written descriptions from the very start rather than having to learn a complex graphical interface. Nevertheless, it is equally important that you have strong product thinking skills when creating an app : a well-defined scope of your app, clearly defined user requirements, careful planning and execution of testing.
Which AI models does Lovable rely on, and does it matter?
Your application's quality, consistency, and ability to handle complex decision-making logic may all be affected by which AI model(s) Lovable uses. As model providers and configuration options can both change, the best course of action is to check Lovable's official documentation and announcement page for the latest and most up-to-date information regarding the AI models used by Lovable.
Can I make money with apps built on Lovable?
Yes, You can generate income through applications developed using Lovable; however, the application itself is typically not a source of assured revenue. The most common forms of generating revenue with an application are developing a micro SaaS subscription service, creating a paid internal tool for a client, or developing a lead generation funnel to provide leads for a service. One of the quickest and easiest ways to generate revenue from an application is to "develop a small application for an audience you already know" and continually improve the application as your known audience continues to offer feedback. (i.e., continually improve and enhance your application.)
What are the most common beginner mistakes in Lovable, and how do I avoid them?
Predictable large-scale errors include overly broad prompt definitions, making multiple changes at once, failing to conduct real-world testing of your users, and building secondary features prior to establishing a solid core workflow. To avoid these, establish a small scope for your application, incrementally iterate through each feature of your application, and test the primary function after making each significant change to the application.
How can I get a better deal or discount on Lovable?
Lovable often has promotional pricing pages that provide discounts with each subscription year. You can check here for limited time Lovable promotions. You will be able to enter your promo code here if you are running a promotion for a new customer; this is also where we will show you exactly what your promo code will unlock.
Get your first Lovable app live
At its best, Lovable will be most effective when used as a disciplined iteration process (build loop); Create a basic product (first version), Test While Safe, Publish Early Enough To Learn And See What Works, But Not Too Early to Miss The Basics Of Quality Assurance. By completing the outlined steps, you will have "Tried" Lovable, through shipping a fully functional first mini-app, with an appreciation for how you can make it better. At this point the value is less about the app, and much more about the self-confidence you gain by seeing a complete idea move from a prompt to published project. This experience seems to greatly reduce the intimidation factor for subsequent builds and makes them seem more purposeful.
If you’re ready to go further, I’d apply the same method to a second project (lead capture page, habit tracker, or lightweight client portal) and then use a Lovable promo code if you have one available to reduce the cost of upgrading when you’re ready to launch.
{{cta-marketplace="/blog-elements"}}